在 iOS Android App 中集成 Bevy 游戏引擎
认识 Bevy
Bevy 是一个开源、跨平台的 Rust 游戏引擎,设计目的是提供一个简单、高效且易于使用的游戏开发框架。它的特点包括:
- 模块化设计:游戏引擎的各个组件皆为单独的模块,方便选择需要的组件并扩展。
- 灵活的插件系统:支持自定义插件,可以创建并集成自己的插件。
- 易于使用的 API:API 简单易懂,帮助快速开始游戏开发。
- 强大的渲染系统:使用了 wgpu 作为渲染后端,以提供强大的图形渲染能力。
- 跨平台:除了支持在 Windows、MacOS 和 Linux 桌面系统及 iOS、Android 移动设备上运行,还能在支持 WebGPU 的浏览器上运行。
Bevy 是一个适合新手的游戏引擎,其简单性和灵活性使得能够轻松地开始游戏开发,随着经验的增加,它也能满足更高级的定制需求。
需求场景
如果需要给已有的 App 添加一个开屏小游戏,或者实现一些动态 UI 组件、图表...,又或者只是想充分利用手机上的 Motion Sensors 来实现令人惊艳的游戏体验,那么就不能使用 Bevy 默认的 WinitPlugin 了。因为 winit 会完全控制 App 的初始化过程和窗口,而我们需要的是在已有的 App 实例中创建 bevy::App, 并且我们可能还希望 bevy::App 能在任意大小的 iOS UIView 或 Android SurfaceView 中运行。
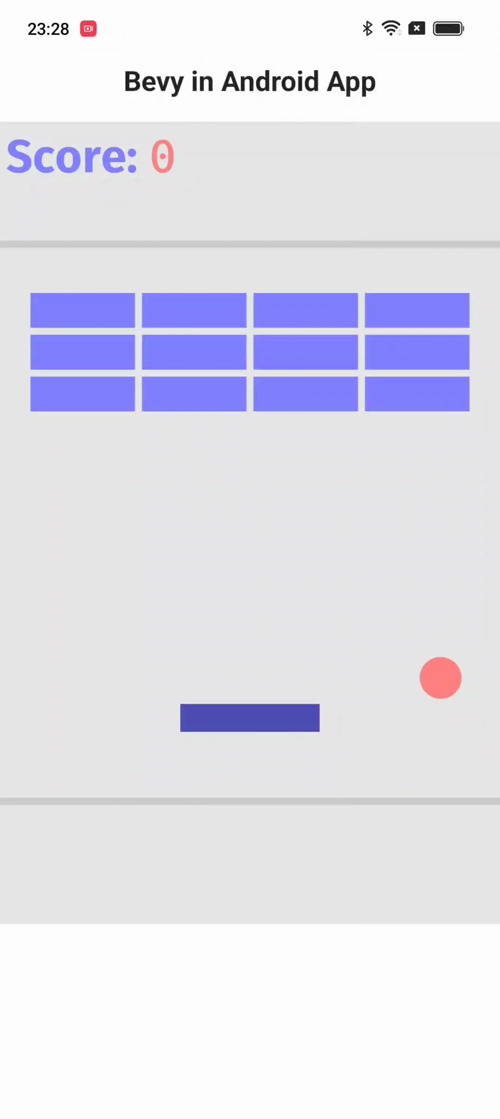
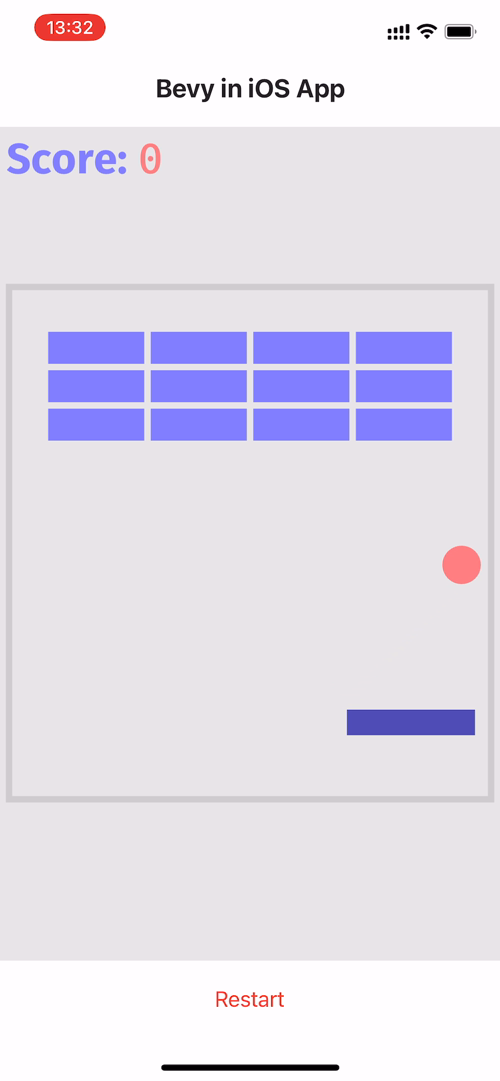
本章我们将逐步实现一个此类场景,并且利用手机的 Motion Sensor 来玩 breakout 小游戏。
Bevy 中的窗口插件
Bevy 中有两个窗口插件:WindowPlugin 与 WinitPlugin。
WindowPlugin 是 Bevy 中构建游戏或应用程序的基础插件, 它提供了一套简单易用的接口来管理窗口的属性(标题、是否可见...)、行为(获取焦点,缩放约束,窗口显示层级...)、与事件(鼠标、键盘、触摸事件...)。WindowPlugin 并不负责实际的窗口创建,它需要与其他插件配合使用。
WinitPlugin 为 Bevy 提供实际的窗口及事件循环的创建与管理。顾名思义,它依赖了 winit 窗口管理库。
下面通过源码来看看 WinitPlugin 是如何完成工作的:
// crates/bevy_winit/src/lib.rs

#[derive(Default)]
pub struct WinitPlugin;

impl Plugin for WinitPlugin {
    fn build(&self, app: &mut App) {
        let mut event_loop_builder = EventLoopBuilder::<()>::with_user_event();
        let event_loop = event_loop_builder.build();
        app.insert_non_send_resource(event_loop);

        app.init_non_send_resource::<WinitWindows>()
            .init_resource::<WinitSettings>()
            .set_runner(winit_runner)
            .add_systems(...);
        // ...
    }
}WinitPlugin 是个实现了 Plugin trait 的空结构体,在 build 函数内向 app World 内添分别加了 EventLoop,WinitWindows,WinitSettings 3 项资源,WinitWindows 用于随后创建并保存窗口实例:
// crates/bevy_winit/src/winit_windows.rs

#[derive(Debug, Default)]
pub struct WinitWindows {
    pub windows: HashMap<winit::window::WindowId, winit::window::Window>,
    // ...
}然后, 设置了一个叫 winit_runner 的 runner 函数,这个函数在用户调用 app.run() 时会被自动执行。
winit_runner() 内调用了 create_window() 来完成最终的窗口创建:
// crates/bevy_winit/src/lib.rs

pub fn winit_runner(mut app: App) {
    // 取出在 build() 中创建的事件循环实例
    let mut event_loop = app
        .world
        .remove_non_send_resource::<EventLoop<()>>()
        .unwrap();

    // 创建一个新的系统状态
    let mut create_window_system_state: SystemState<(Commands, Query<(Entity, &mut Window),
    Added<Window>>, EventWriter<WindowCreated>,NonSendMut<WinitWindows>)>
        = SystemState::from_world(&mut app.world);

    let event_handler = move |event: Event<()>,
                              event_loop: &EventLoopWindowTarget<()>,
                              control_flow: &mut ControlFlow| {
        // ...
        // 创建新窗口
        let (commands, mut new_windows, created_window_writer, winit_windows) =
                create_window_system_state.get_mut(&mut app.world);
        create_window(
            commands,
            event_loop,
            new_windows.iter_mut(),
            created_window_writer,
            winit_windows,
            ...
        );
        // ...
    }
}

// crates/bevy_winit/src/system.rs

pub(crate) fn create_window<'a>(
    mut commands: Commands,
    event_loop: &EventLoopWindowTarget<()>,
    created_windows: impl Iterator<Item = (Entity, Mut<'a, Window>)>,
    mut event_writer: EventWriter<WindowCreated>,
    mut winit_windows: NonSendMut<WinitWindows>,
) {
    for (entity, mut window) in created_windows {
        // ...
        // 创建 winit 窗口
        let winit_window = winit_windows.create_window(event_loop, entity, &window);
        // 更新 bevy 窗口的状态
        window.resolution.XXX;
        // ...
    }
}实现 AppViewPlugin
接下来要做的就是使用自定义的窗口插件来替代 WinitPlugin。具体怎么做呢?简单模仿 WinitPlugin !
首先,需要实现一个创建与保存窗口实例的结构体。由于我们的宿主 App 已经有完整的事件循环了,创建及管理事件循环的步骤都可以免了:
// bevy_in_app/src/app_view/app_views.rs

#[derive(Debug, Default)]
pub struct AppViews {
    views: HashMap<WindowId, AppView>,
    entity_to_window_id: HashMap<Entity, super::WindowId>,
}

impl AppViews {
    pub fn create_window(
        &mut self,
        #[cfg(target_os = "ios")] view_obj: super::IOSViewObj,
        #[cfg(target_os = "android")] view_obj: super::AndroidViewObj,
        entity: Entity,
    ) -> Window { ... }
}AppViews 里的 AppView、IOSViewObj、AndroidViewObj 在前面的与 iOS App 集成及与 Android App 集成分别有详细介绍,简单来讲,IOSViewObj 封装了 iOS UIView 实例,AndroidViewObj 封装了 Android SurfaceView 所持有的 ANativeWindow 实例,AppView 实现了 HasRawWindowHandle 与 HasRawDisplayHandle trait。
// bevy-in-app/src/app_view/mod.rs

pub struct AppViewPlugin;

impl Plugin for AppViewPlugin {
    fn build(&self, app: &mut App) {
        app.init_non_send_resource::<AppViews>().add_systems(
            (
                changed_window.ambiguous_with(exit_on_all_closed),
                despawn_window.after(changed_window),
            )
                .in_base_set(CoreSet::Last),
        );
    }
}上面就是 AppViewPlugin 的完整代码,就这么简单。
值得注意的是,在 build() 中没有像 WinitPlugin 一样设置 runner 函数,这是怎么回事?
前面已经提到,设置的 runner 函数会在调用 app.run() 时被自动执行。查看源码可以到此函数会将 app 实例从内存中移出并传递 runner,用户端的 app 被替换成了空实例:
// crates/bevy_app/src/app.rs

pub fn run(&mut self) {
	// ...
	let mut app = core::mem::replace(self, App::empty());
	let runner = core::mem::replace(&mut app.runner, Box::new(run_once));

	(runner)(app);
}我们需要从宿主 App 事件循环中调用 Bevy App 实例,所以不能让 runner 拿走它,改由从 src/ffi/create_bevy_app() 函数中手动调用:
// bevy-in-app/src/ffi/iOS.rs

#[no_mangle]
pub fn create_bevy_app(view: *mut objc::runtime::Object, scale_factor: f32) -> *mut libc::c_void {
    let mut bevy_app = crate::create_breakout_app();
    let ios_obj = IOSViewObj { view, scale_factor };
    bevy_app.insert_non_send_resource(ios_obj);

    create_bevy_window(&mut bevy_app);
    // ...
}

// bevy-in-app/src/app_view/mod.rs

pub fn create_bevy_window(app: &mut App) {
    #[cfg(target_os = "ios")]
    let view_obj = app.world.remove_non_send_resource::<IOSViewObj>().unwrap();
    #[cfg(target_os = "android")]
    let view_obj = app.world.remove_non_send_resource::<AndroidViewObj>().unwrap();

    let mut create_window_system_state: SystemState<(
        Commands,
        Query<(Entity, &mut Window), Added<Window>>,
        EventWriter<WindowCreated>,
        NonSendMut<AppViews>,
    )> = SystemState::from_world(&mut app.world);
    let (mut commands, mut new_windows, mut created_window_writer, mut app_views) =
        create_window_system_state.get_mut(&mut app.world);

    for (entity, mut bevy_window) in new_windows.iter_mut() {
        if app_views.get_view(entity).is_some() {
            continue;
        }
        let app_view = app_views.create_window(view_obj, entity);
        let logical_res = app_view.logical_resolution();

        bevy_window
            .resolution
            .set_scale_factor(app_view.scale_factor as f64);
        bevy_window.resolution.set(logical_res.0, logical_res.1);

        commands.entity(entity).insert(RawHandleWrapper {
            window_handle: app_view.raw_window_handle(),
            display_handle: app_view.raw_display_handle(),
        });

        created_window_writer.send(WindowCreated { window: entity });
    }
    create_window_system_state.apply(&mut app.world);
}create_bevy_window 函数的完整执行逻辑如下: 0. 从 World 中取出 IOSViewObj 或 AndroidViewObj 目标平台的视图对象资源;
- 创建一个新的系统状态,并获取所需的命令队列,窗口实体列表,窗口创建写入器(EventWriter<WindowCreated>)和
AppViews的可变借用; - 遍历窗口实体列表,检查窗口是否已经被创建;
- 调用
AppViews的create_window()创建一个新窗口app_view(也就是实现了raw-window-handletraits 的AppView); - 调用
app_view的相关函数与字段更新 Bevy window 的物理分辨率缩放因子及逻辑分辨率; - 通过命令队列
commands将app_view中实现的窗口句柄插入到实体中; - 窗口创建写入器发送一个包含了新窗口的实体的
WindowCreated; - 最后,调用
apply()函数应用系统状态;
IOSViewObj 与 AndroidViewObj 遵循了 Bevy 中资源传递的惯例,在 create_bevy_app() FFI 函数中调用 insert_non_send_resource() 将其插入到 World。 此处没使用 insert_resource() 有两个原因:
IOSViewObj不是线程安全的,iOS UIView 中的函数只能在主线程中使用;
error[E0277]: `*mut Object` cannot be sent between threads safely
  --> src/app_view/ios.rs:21:26
   |
21 | #[derive(Debug, Default, Resource)]
   |                          ^^^^^^^^ `*mut Object` cannot be sent between threads safely
   |
   = help: the trait `Send` is not implemented for `*mut Object`
= note: required for `Option<*mut Object>` to implement `Sync`- 事实上也并不需要在多线程环境中来创建窗口;
链接 libc++ 库
实现了 AppViewPlugin 后运行 cargo so b --lib --target aarch64-linux-android 将 crate 编译为 .so 库文件,在 Android 项目中加载时将得到如下错误:
dlopen failed: cannot locate symbol "__gxx_personality_v0" referenced by ...我们知道 Bevy 项目通过 cargo-apk 命令编译为 .apk 是可以在 Android 上安装运行的,于是查看 cargo-apk 的源码:
self.add_lib(&artifact, target)?;
for need in list_needed_libs(&readelf_path, &artifact)? {
	// c++_shared is available in the NDK but not on-device.
	// Must be bundled with the apk if used:
	// https://developer.android.com/ndk/guides/cpp-support#libc
	let search_paths = if need == "libc++_shared.so" {
		// ...
	}
	// ...
}根据注释里的相关链接及 libc++_shared 链接库名称,就知道如何在我们的项目里链接 Android libc++ 共享库了, 在 android.rs 中添加如下代码:
// bevy-in-app/src/ffi/android.rs

#[link(name = "c++_shared")]
extern "C" {}编译后运行, 现在出现了新的情况:
dlopen failed: library "libc++_shared.so" not found有两个解决途径:
- 从 GitHub 下载编译好的
libc++_shared.so放到jniLibs/XX目录下; - 使用
externalNativeBuild配置一个空的 c++ 原生库的构建, Gradle 会自动将该库添加到 App 中;
bevy-in-app 使用了第二种方式,仅需一点模板化的配置,可以直接查看项目源码,这里就不贴出来了。
调用 Motion Sensors
以 Android 为例:
class BevySurfaceView : SurfaceView, SurfaceHolder.Callback2 {
    private var sensorManager: SensorManager? = null
    private var mSensor: Sensor? = null
    private var sensorValues: FloatArray = FloatArray(3)

    constructor(context: Context) : super(context) {
        // 获取传感器服务
        sensorManager = context.getSystemService(Context.SENSOR_SERVICE) as SensorManager
        // 获取重力传感器,用于检测设备的重力变化
        mSensor = sensorManager?.getDefaultSensor(Sensor.TYPE_GRAVITY)
    }

    override fun surfaceCreated(holder: SurfaceHolder) {
        holder.let { h ->
            // ...
            // 创建了一个传感器事件监听器
            var sensorEventListener = object : SensorEventListener {
                // 当传感器的值改变时,更新 sensorValues 变量的值
                override fun onSensorChanged(event: SensorEvent?) {
                    if (event != null) {
                        sensorValues = event.values
                    }
                }
                override fun onAccuracyChanged(sensor: Sensor?, accuracy: Int) {
                }
            }
            mSensor?.also { sensor ->
                // 注册上边创建的事件监听器,以便开始监听传感器事件
                sensorManager?.registerListener(sensorEventListener, sensor, SensorManager.SENSOR_DELAY_GAME)
            }
        }
    }
}现在已经有了实时变化的传感器数据,仅需调用 Rust 端实现的 FFI 函数来发送此输入事件。
Android 端:
override fun draw(canvas: Canvas?) {
    // ...
    bevyApp.device_motion(bevy_app, sensorValues[0], sensorValues[1], sensorValues[2])
    bevyApp.enter_frame(bevy_app)
    // invalidate() 函数通知通知 App,在下一个 UI 刷新周期重新调用 draw() 函数
    invalidate()
}Rust 端:
// bevy-in-app/src/ffi/android.rs

#[no_mangle]
#[jni_fn("name.jinleili.bevy.RustBridge")]
pub fn device_motion(_env: *mut JNIEnv, _: jobject, obj: jlong, x: jfloat, _y: jfloat, _z: jfloat) {
    let app = unsafe { &mut *(obj as *mut App) };
    let x: f32 = x as _;
    if x < -0.2 {
        crate::change_input(app, KeyCode::Left, ButtonState::Released);
        crate::change_input(app, KeyCode::Right, ButtonState::Pressed);
    } else if x > 0.2 {
        crate::change_input(app, KeyCode::Right, ButtonState::Released);
        crate::change_input(app, KeyCode::Left, ButtonState::Pressed);
    } else {
        crate::change_input(app, KeyCode::Left, ButtonState::Released);
        crate::change_input(app, KeyCode::Right, ButtonState::Released);
    }
}

// bevy-in-app/src/lib.rs

#[cfg(any(target_os = "android", target_os = "ios"))]
pub(crate) fn change_input(app: &mut App, key_code: KeyCode, state: ButtonState) {
    let input = KeyboardInput {
        scan_code: if key_code == KeyCode::Left { 123 } else { 124 },
        state,
        key_code: Some(key_code),
    };
    app.world.cell().send_event(input);
}如何重启/退出 Bevy 引擎
Bevy 引擎默认的行为是,当所有窗口关闭时自动退出。显然,这不能满足当前的场景,因为我们需要在不销毁 iOS UIView 或 Android SurfaceView 的情况下原地重启 Bevy App。 为此,需要自定义一个退出函数,以确保在需要的时候可以手动退出:
// bevy-in-app/src/lib.rs

#[cfg(any(target_os = "android", target_os = "ios"))]
pub(crate) fn exit_bevy_app(mut app: Box<App>) {
    // 创建一个查询所有窗口的状态变量
    let mut windows_state: SystemState<(Commands, Query<(Entity, &mut Window)>)> =
        SystemState::from_world(&mut app.world);
    // 获取命令列表与窗口列表的可变借用
    let (mut commands, windows) = windows_state.get_mut(&mut app.world);
    // 遍历并提交所有窗口实体的销毁命令
    for (window, _focus) in windows.iter() {
        commands.entity(window).despawn();
    }
    windows_state.apply(&mut app.world);
    // 由于我们没有使用 Bevy App 的 runner 函数,需要手动 update
    app.update();
}运行